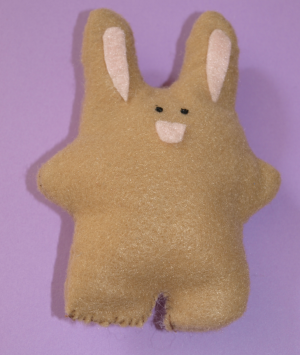
What you need: paper, pencil, felt in brown and pink, pink fabric paint, black fabric paint, white felt, scissors, thread, needle, craft glue, stuffing
What you do:
1. Draw yourself a bunny pattern on your template. Remember to make it a chubby sort of bunny – those are easier to sew and turn inside out.
2. Cut the bunny pattern out and trace around the edge of the pattern on the felt.
3. Cut out the bunny shape.
4. Sew around the edge of your bunny. Leave a two-inch area that you DON’T sew. This is where you’ll turn your bunny inside out. It’s good to make this area on your bunny’s side or the top of its head (if you’re planning on putting a bow on it).
5. Turn your bunny inside out. Stuff your bunny full of fluff and then sew up the hole.
6. Using your fabric paint, draw on a pink nose. Cut out two pink inner-ears and glue them in place. Put two black fabric paint dots for eyes.
7. When everything is dry, turn your bunny over and glue on a white felt tail.
8. Add any accessories you want – a bow, a vest – whatever!
9. Make a bunch of bunnies to give out to your friends!


that is really cool! i will try one! :) :D